Cheat Sheet Erste Schritte / First Steps with MyOdoo.sh - Visual Code
Dieser Spickzettel ist für die Einrichtung und Nutzung der MyOdoo.sh und Odoo / This cheat sheet is for setting up and using the MyOdoo.sh and Odoo
Anmeldung
Man ruft die vorgegebene URL vsxx.myodoo.sh im Browser auf und meldet sich mit seinem Passwort an:
(Zugangsdaten vom Admin ![]() )
)

Die Visual Studio Code Oberfläche erscheint im Browser.
Python Version
Es soll die neueste Python Version in VSC benutzt werden.
Extensions installieren:
DEBUGGER NUR OHNE WORKER IN ODOO.CONF
Einmalige Schritte:
Gitlab & Github und myodoo.sh verbinden
Um die VM noch mit Gitlab zu verbinden, generiert man sich den Key wie im Artikel Cheat Sheet für VM Shell Shortcuts unter git Zugriff vorbereiten beschrieben.
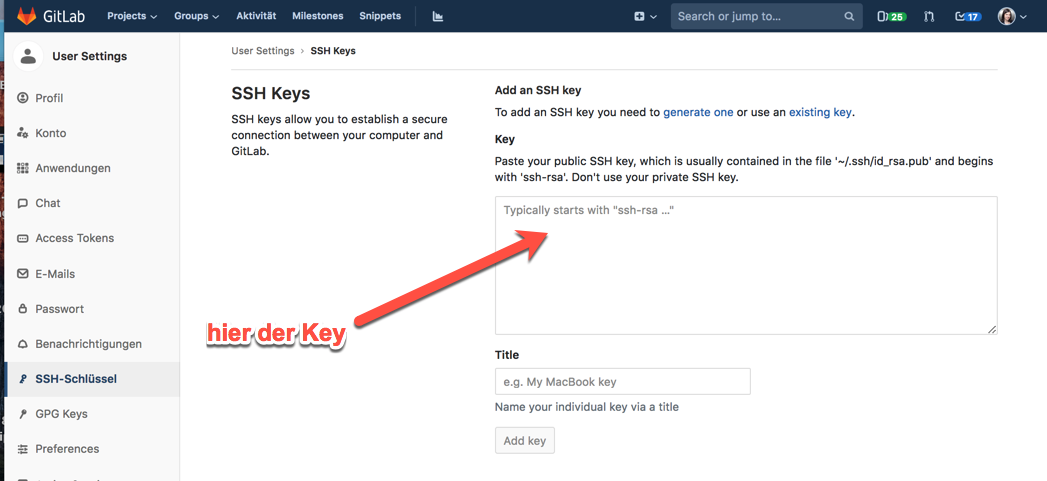
Dann geht man ins Gitlab und hinterlegt den Key im Profil unter Settings > SSH Schlüssel
Mit dem gleichen Key sollte man sich ebenso mit Github https://github.com/ verbinden: auf den Benutzer oben rechts klicken > Einstellungen > SSH & GPG Keys
Neuen SSH Key hinterlegen: 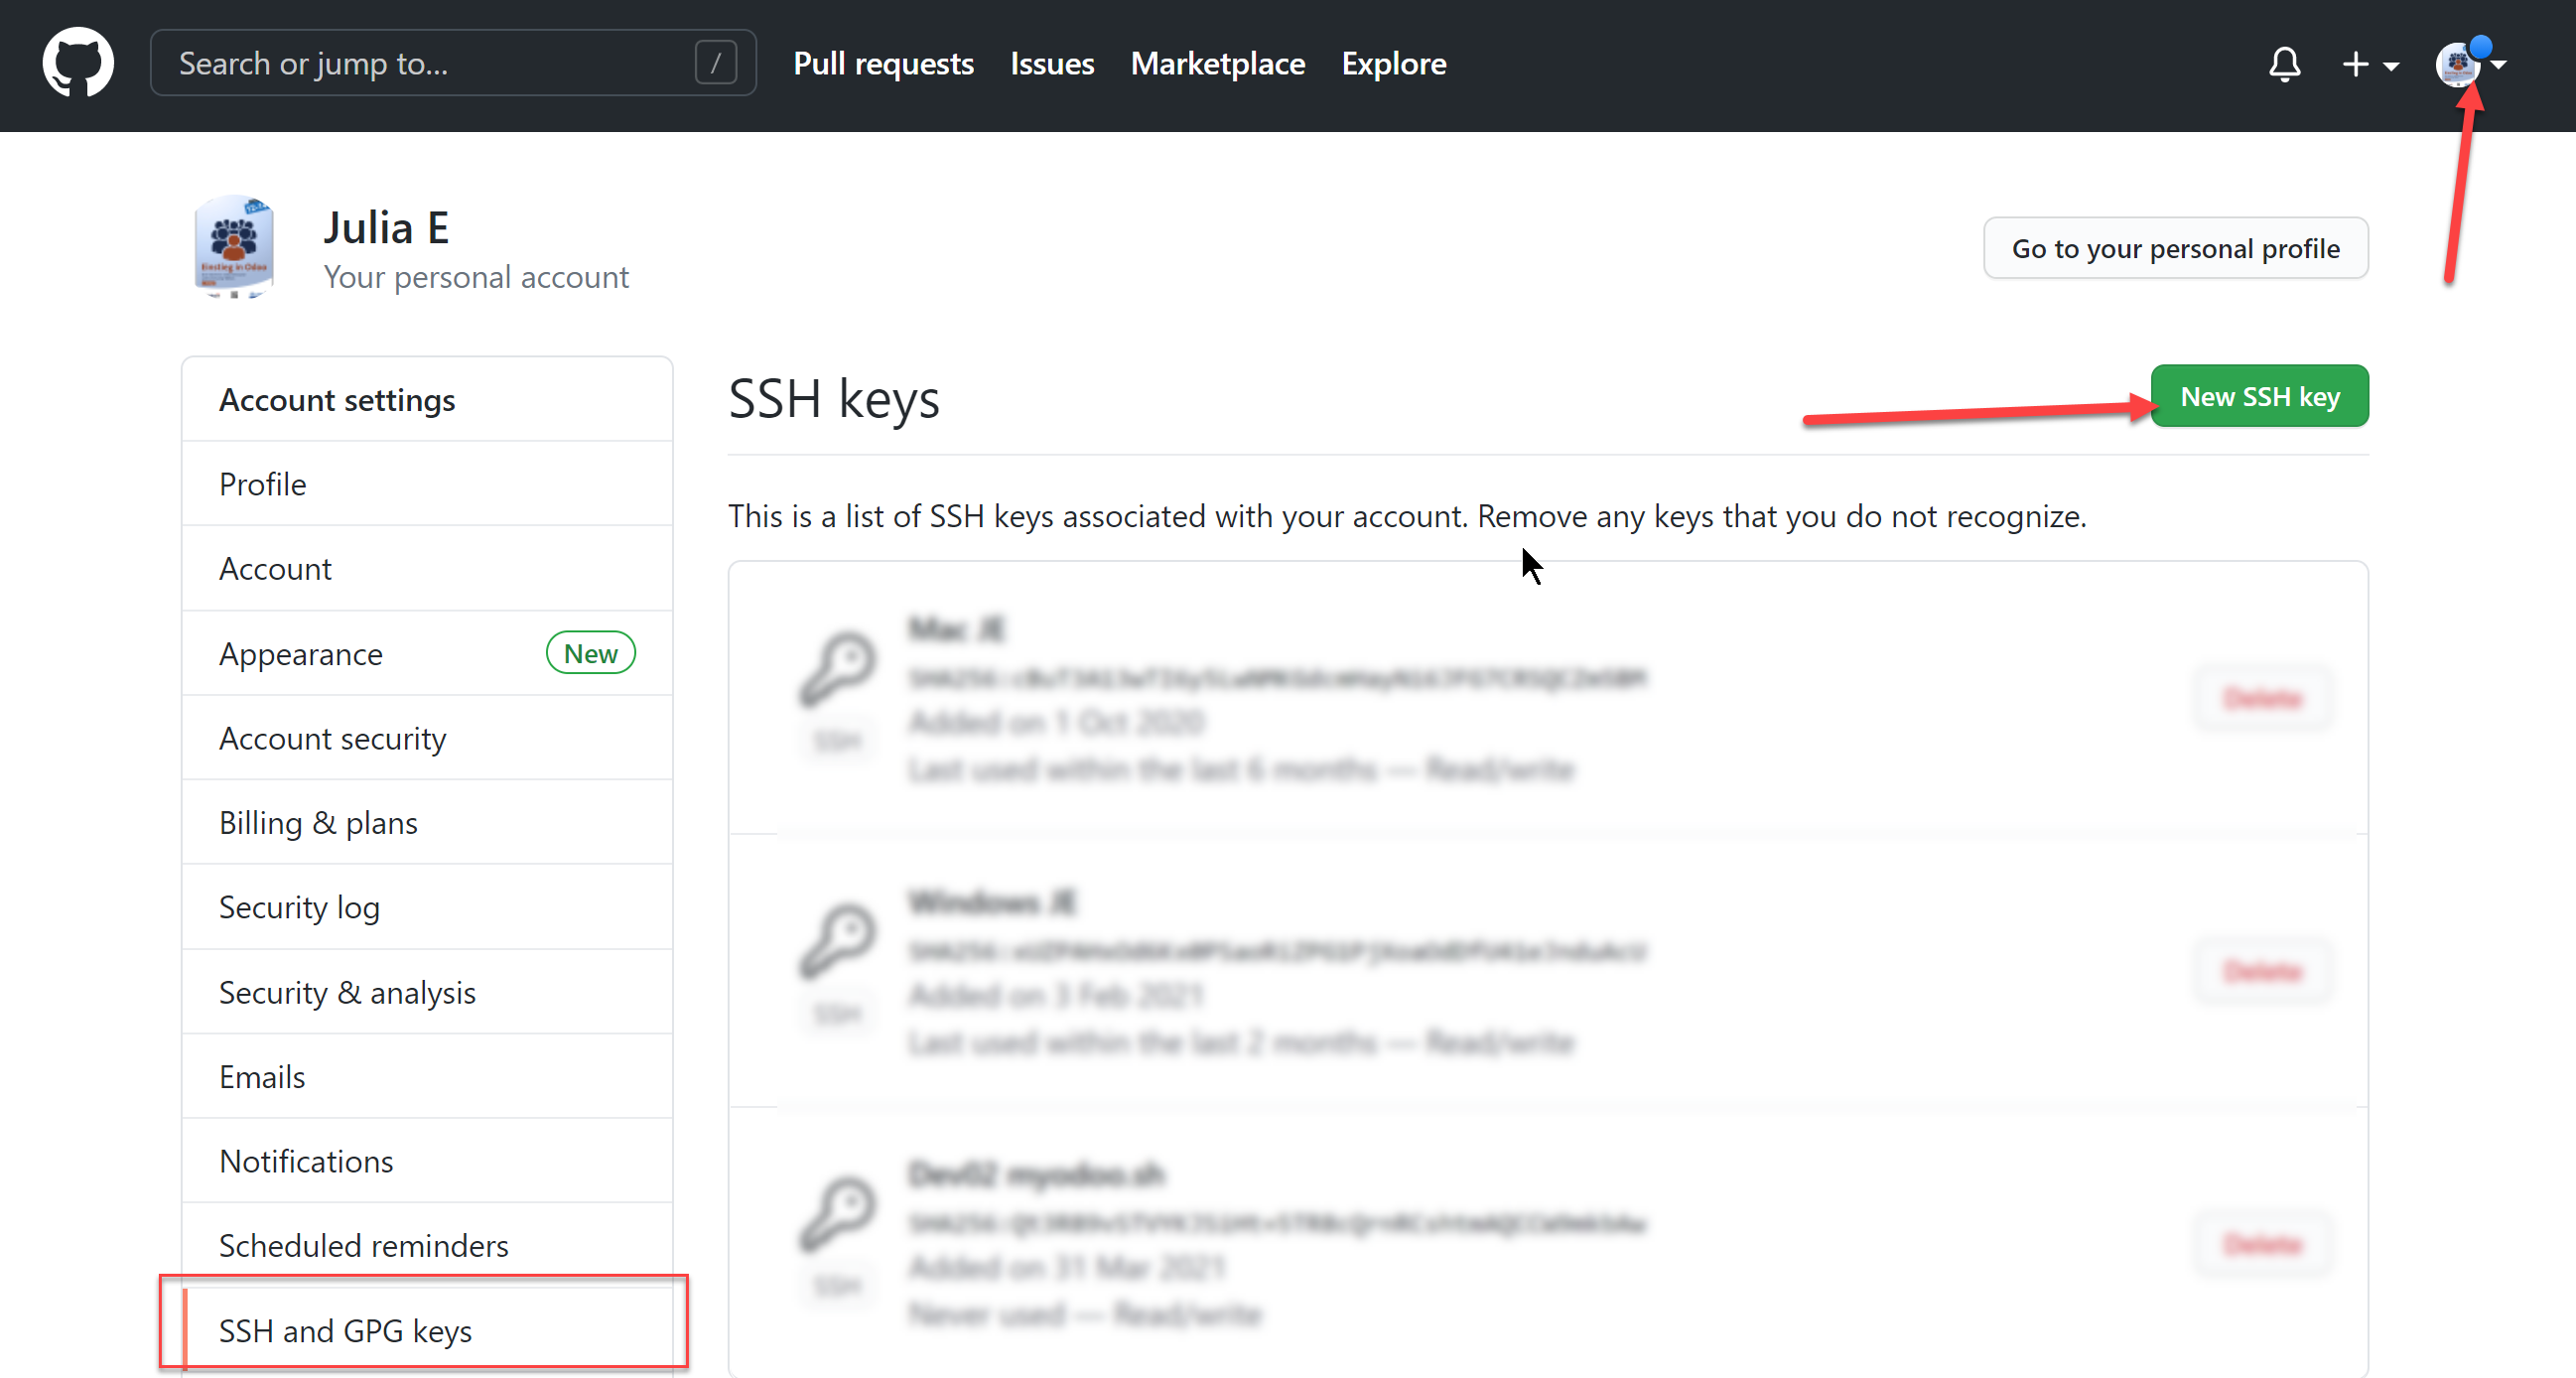
Es empfiehlt sich anschließend einen Test Commit zu machen.
dev-helper pullen
Repository: https://gitlab.ownerp.io/myodoo-tools/dev-helpers
Über Terminal in /config/workspace/gitbase navigieren.
cd config/workspace/gitbase
git clone -b myodoo.sh git@gitlab.ownerp.io:myodoo-tools/dev-helpers.git
Initalskript ausführen
Über Terminal in /gitbase/dev-helpers/scripts/gitpull navigieren.
cd /config/workspace/gitbase/dev-helpers/scripts/gitpull
Odoo Server müssen separat gezogen werden für alle Versionen: (https://gitlab.ownerp.io/myodoo-tools/dev-helpers/-/blob/myodoo.sh/scripts/gitpull/get-initial-gitlab-odoo-servers.py)
python get-initial-gitlab-odoo-servers.py
Installationen:
Weitere Schritte / Nutzung:
Repositories pullen / updaten (ehemals switch-to-develop)
In den jeweiligen Pfad navigieren z.B. /gitbase/v13 über File > Open Folder> Pfad

Run and Debug Symbol klicken und Pull v13 Repositories (oder v10 oder v11 oder v12 oder v14) 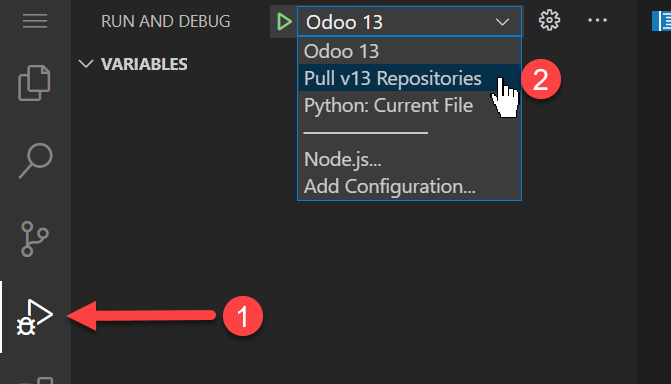
Datenbank restore
ZIP-Dateien müssen im uploads Ordner liegen
Variante 1 im Terminal: wget - Befehl z.B. aus Dropbox: wget https://www.dropbox.com/s/7xph0yoh3v0o2kn/v13_skr03_demo_2021-03-31.zip
Variante 2: per Skript cloud-downloader-equitania > Hidrive/ Onedrive / Dropbox / Google Drive möglich!

Installiert das Skript per pip install in eurer Dev-Umgebung:
pip install cloud-downloader-equitania
Navigiert in den uploads Ordner:
cd /config/workspace/uploads

cloud-download
cloud-download --help zeigt die Befehle an: 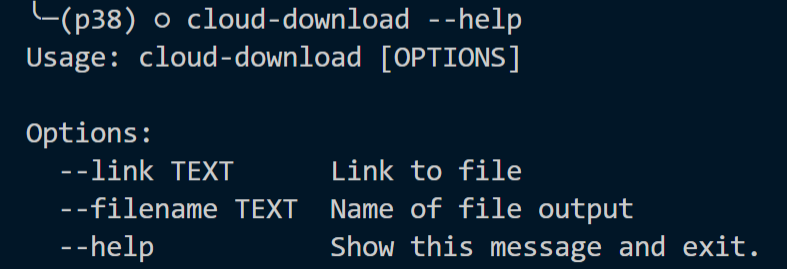
Diese können auch direkt in den Befehl eingefügt werden:
cloud-download --link deinlinkzumfile --filename output.zip
Über Terminal in /gitbase/dev-helpers/scripts/ navigieren:
cd /config/workspace/gitbase/dev-helpers/scripts/
Restore Zip ausführen:
./restore-zip.sh
Der Rest des Restores läuft wie in einer Guacamole VM.
WICHTIG: beim Restore immer mit Versionskürzel beginnen v12_ v13_ v14_ usw.
Datenbank / Odoo starten:
- Terminal öffnen
Odoo Umgebung wechseln: z.B. dev13
Den Befehl für den Start einer DB eingbeben. (Beispiele aus exam10 / exam12 / exam13 usw. holen)
Z.B.
./odoo-bin -c /config/workspace/gitbase/dev-helpers/conf/odoo13.conf --db-filter=v13_basis --i18n-overwrite --load-language=de_DE -d v13_basis -u all
URL für Browser: devxx.myodoo.sh > interner Port 8069
Eine zweite Odoo Sitzung kann über den Port 9069 > devxx-2.myodoo.sh gestartet werden. (mit separater Odoo Config Datei → xmlrpc_port = 9069)
Wichtige Ordner:
Unter odoo-share: hier findet man den Filestorage
Unter upgrade: für Datenbank upgrade Prozesse nötig
Unter rm-odoo: über Access code Kunderserver builden
Unter uploads: die Datenbanken Zips
Unter venv: Python environment hinterlegt
Alle Python Prozesse stoppen
# kill
pkill python

# check
pgrep python
Eigene Configs anlegen
Neuen Ordner conf z.B. unter /config/workspace/conf anlegen und dort eine eigene Config-Files anlegen. (Rechtsklick > New file)
Dementsprechend muss der Startpfad für die DB auf ./odoo-bin -c /config/workspace/myconf/odoo12_xy.conf angepasst werden
Pull Vorgang
Über das Terminal:
git pull
oder wie oben beschrieben in Abschnitt "Repositories pullen"
Commit & Push Vorgang
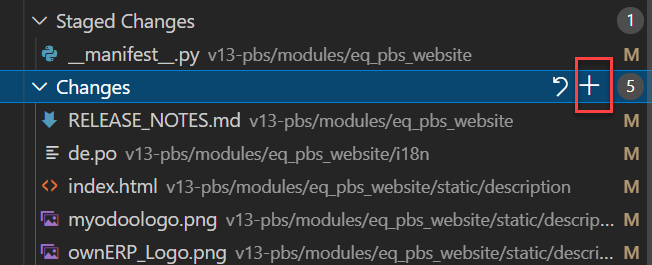
Die Änderungen über das Plus-Zeichen stagen:
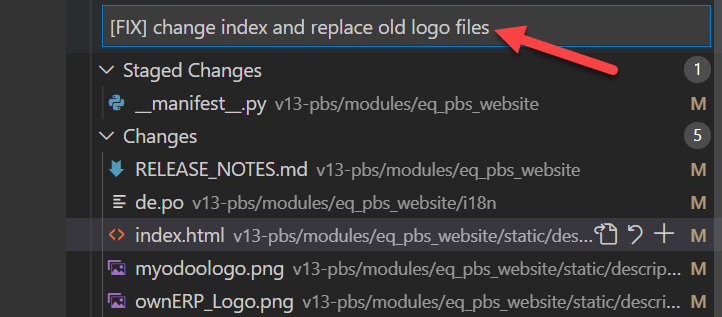
Commit Message eingeben:
Shortcut Control + Enter = Commit
Über das Pfeil-Icon pushen:

Oder über die 3-Punkte > Push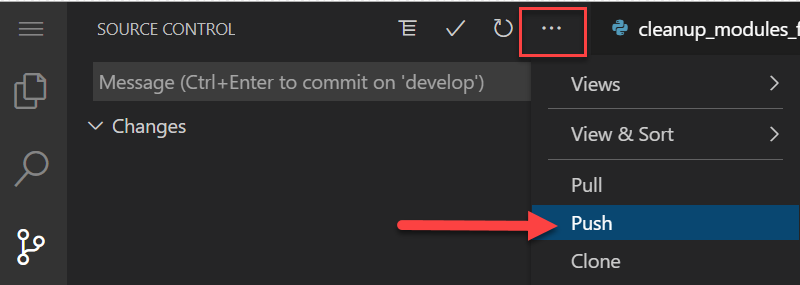
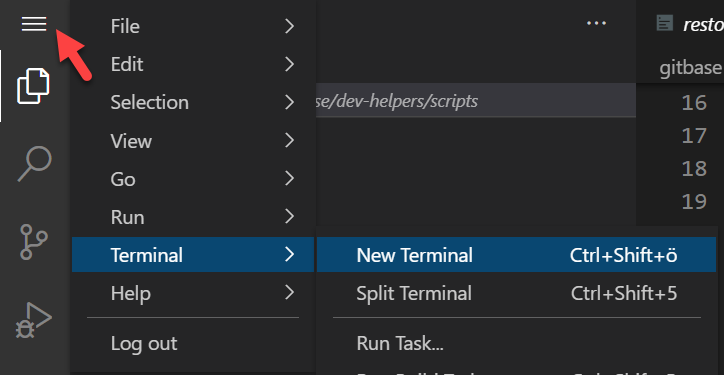
Zweites Terminal öffnen:
Um ein weiteres Terminal zu öffnen, gehen Sie auf das Plus-Zeichen im Terminal neben dem Dropdown:
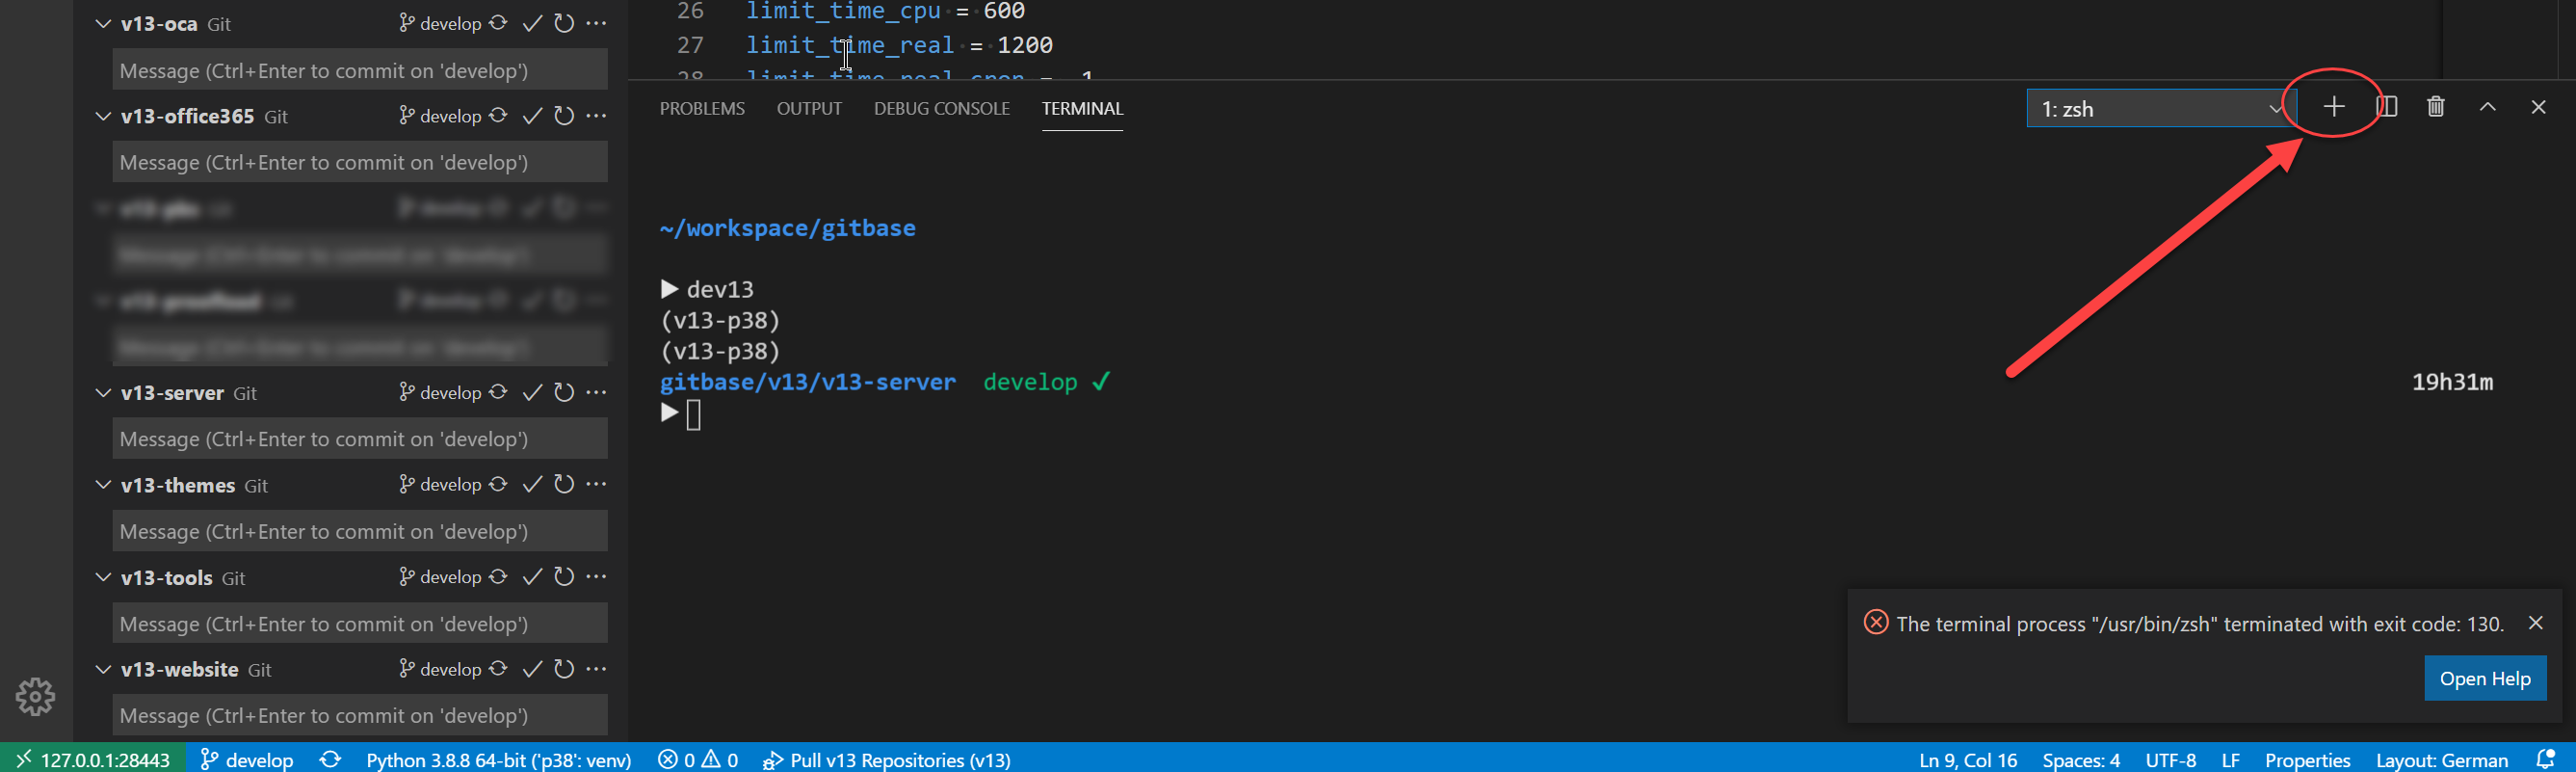
Wechsel zwischen den beiden Terminals über das dropdown:

Bei mehr als zwei Terminals empfiehlt sich die Anwendung von tmux (siehe unten).
SQL Abfragen über PG Admin im Browser
URL: pgxx.myodoo.sh
+ User aus 1Password.
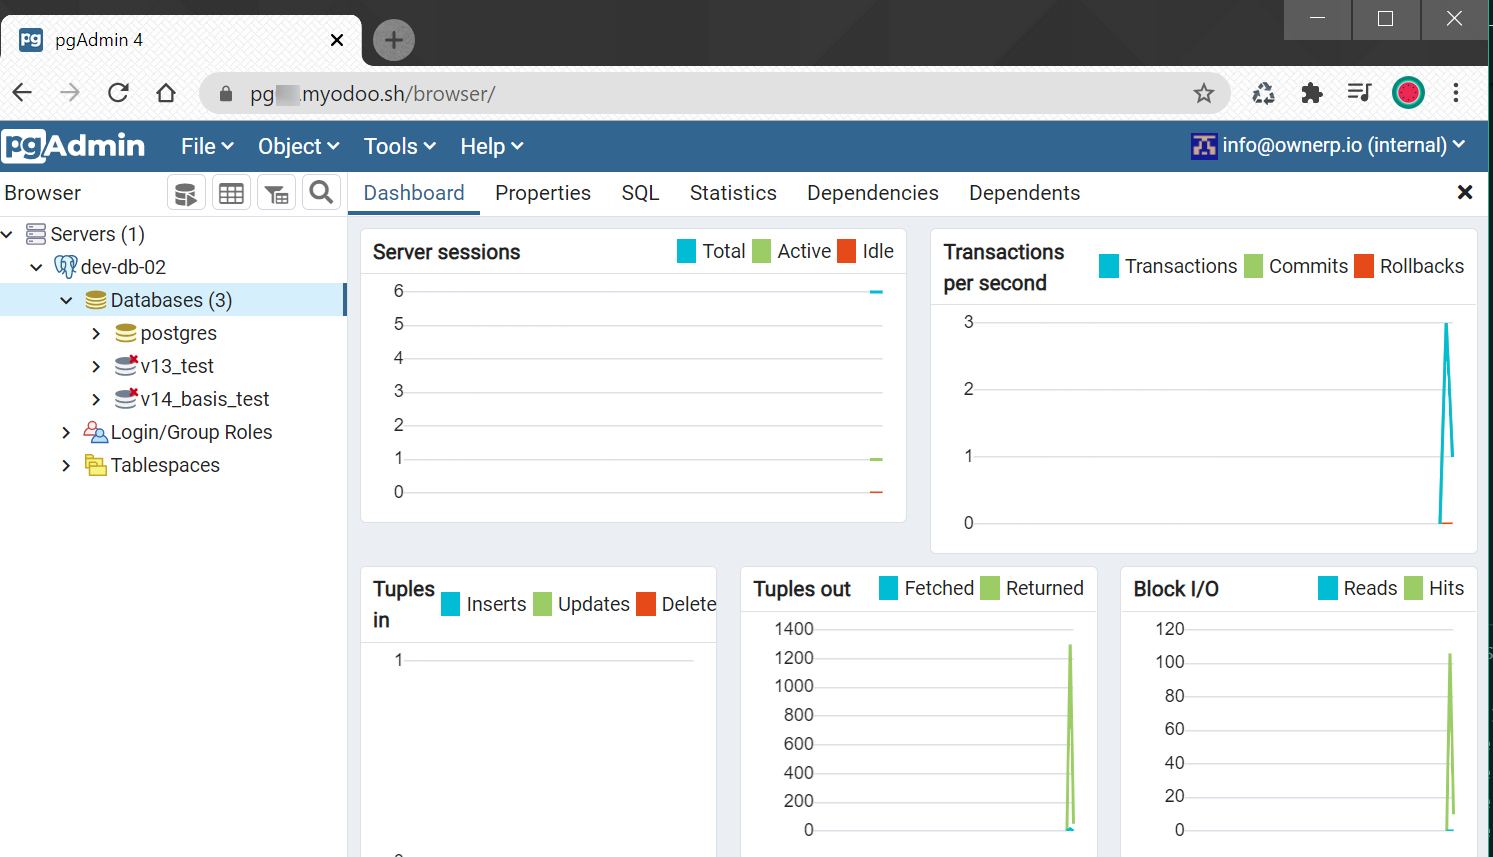
Wenn eine DB nicht gelöscht werden kann, können noch offene Sessions der Grund sein.
SELECT pg_terminate_backend(pid) FROM pg_stat_activity
WHERE
    -- don't kill my own connection!
    pid <> pg_backend_pid()
    -- don't kill the connections to other databases
    AND datname = 'database_name';
Wichtige Shell Shortcuts and tmux: Cheat Sheet für myodoo.sh Shortcuts

ENGLISCH
Login
Open the URL vsxx.myodoo.sh in a browser and login with your password:
(Credentials from Admin ![]() )
)
The Visual Studio Code screen appears in Browser.
Python Version
Use the latest Python Version in VSC.
Install Extensions:
ONLY DEBUGGING WITHOUT WORKERS IN ODOO.CONF
Unique steps:
Connect gitlab & github and myodoo.sh
To connect the VM to Gitlab, generate the key as described in the article Cheat Sheet for VM Shell Shortcuts under Prepare git Access.
Then go to Gitlab and store the key in the profile under Settings > SSH Key.
With the same key you should also connect to your Github https://github.com/ account: go to your user top right > Settings> SSH & GPG Keys
New SSH Key entry:
A test Commit is recommended.
Pull dev-helpers
Repository: https://gitlab.ownerp.io/myodoo-tools/dev-helpers
Über Terminal in /config/workspace/gitbase navigieren.
cd /config/workspace/gitbase
git clone -b myodoo.sh git@gitlab.ownerp.io:myodoo-tools/dev-helpers.git
Do the Inital scripts
Over the terminal navigate to /gitbase/dev-helpers/scripts/gitpull
cd /config/workspace/gitbase/dev-helpers/scripts/gitpull
Odoo servers must be pulled separately for all versions: (https://gitlab.ownerp.io/myodoo-tools/dev-helpers/-/blob/myodoo.sh/scripts/gitpull/get-initial-gitlab-odoo-servers.py)
python get-initial-gitlab-odoo-servers.py
Installations:
More steps / usage:
Pull repositories/ update (was switch-to-develop before)
Navigate to the path you need e.g. /gitbase/v13 over File > Open Folder> Path
Click the Run and Debug symbol and click on Pull v13 Repositories (oder v10 oder v11 oder v12 oder v14)
Database restore
ZIP-files have to be in the uploads directory.
Variant 1 in terminal: wget - command e.g. from a Dropbox: wget https://www.dropbox.com/s/7xph0yoh3v0o2kn/v13_skr03_demo_2021-03-31.zip
Variante 2 over Script: cloud-downloader-equitania > Hidrive/ Onedrive / Dropbox / Google Drive possible!
Install the script over pip install in your dev environment:
pip install cloud-downloader-equitania
Navigate into uploads folder:
cd /config/workspace/uploads

cloud-download
cloud-download --help shows options:
These can be added directly into the command:
cloud-download --deinlinkzumfile --output.zip
Navigate over the terminal in /gitbase/dev-helpers/scripts/ :
cd /config/workspace/gitbase/dev-helpers/scripts/
Execute Restore Zip:
./restore-zip.sh
The rest of the restore is like in guacamole VM.
IMPORTANT: when restoring always start with version abbreviation v12_ v13_ v14_ etc.
Start database / Odoo:
- open Terminal
Change Odoo environment : e.g. dev13
Enter the command for starting a DB. (exam10 / exam12 / exam13 etc. )
E.g.
./odoo-bin -c /config/workspace/gitbase/dev-helpers/conf/odoo13.conf --db-filter=v13_basis --i18n-overwrite --load-language=de_DE -d v13_basis -u all
URL for Odoo in Browser: devxx.myodoo.sh > internal Port 8069
A second Odoo session can be started via port 9069 > devxx-2.myodoo.sh (with separate Odoo Config file → xmlrpc_port = 9069)
Important directories:
In odoo-share: here is our filestorage
In upgrade: for database upgrade processes
In rm-odoo: build over Access code customer servers
In uploads: database Zips
In venv: Python environments
Kill all Python processes
# kill
pkill python

# check
pgrep python
Make your own Config files
Create a new folder conf e.g. under /config/workspace/conf and create your own config file there. (Right click > New file)
Accordingly the start path for the DB must be adapted to ./odoo-bin -c /config/workspace/myconf/odoo12_xy.conf
Pull process
Over Terminal:
git pull
or like written before in section "Pull repositories"
Commit & Push process
Stage changes over the plus sign:
Enter a commit message:
Shortcut Control + Enter = Commit
Push over the arrow sign:
OR over the 3 dots > Push
Open second terminal:
To open another terminal, go to the plus sign in the terminal next to the dropdown:
Switch between the two terminals using the dropdown:
If there are more than two terminals, it is recommended to use tmux (see below).
SQL queries over PG Admin in browser
URL: pgxx.myodoo.sh
+ User from 1Password.
If a DB cannot be deleted, open sessions can be the reason then kill session in PG Admin:
SELECT pg_terminate_backend(pid) FROM pg_stat_activity
WHERE
    -- don't kill my own connection!
    pid <> pg_backend_pid()
    -- don't kill the connections to other databases
    AND datname = 'database_name';